Sunday, July 26, 2015

Plants vs Zombies: Garden Warfare Papercraft

Plants vs Zombies Papercraft (Gargantuar)

Hello all! I wanted to share a paper craft that I made with my oldest son for his 11th birthday last weekend. He is so sweet, he said that all he wanted for his birthday was a paper craft of his favorite character from PVZ Garden Warfare, Gargantuar. 

He and I searched and searched and found a fantastic designer that designs paper crafts of all kinds. Visit his deviantart site HERE. His name is Jeff and his Deviantart name is Jepi12. Not only are his designs the best I have seen but he is absolutely wonderful to work with. He responds to messages quickly and really helped to make my son's birthday the best it could be. You have got to check out his designs. He has a design for everyone! Here is the design of Gargantuar that we did and then I will show you our finished project. My boys and I made the paper craft together.

Here is a picture of the Gargantuar. Click on the picture and it will take you to Jeff's site. 


My goal was to create a tutorial of this paper craft but I didn't think about it until I was half way done. We will be making another one of Jeff's design soon and I will make a tutorial of that one. We are making Plants vs Zombies characters and the next one is the "yeti". So stay tuned! 

I hope you enjoy the picture of our finished project below! The project was 33 pages printed out. The final project is bigger than I expected and my son loved it even more.


The pea shooter and zombie next to Gargantuar were other characters we made from another designer. However, since they were PVZ they had to include them. You can't see the IMP on the back of Gargantuar's back but he is there! I hope you enjoy!!!

Thank you,


#plantsvszombies #plants #zombies #gardenwarfare #papercraft #gargantuar


Tuesday, July 14, 2015

Badge Holder Reel Design


Below, you will see the badge reels. I mostly use black and white. I also make ones without the bottle cap. I just wanted to share a few designs that I made below. I do take requests and will attempt to make any design  upon request. My plan plan is to make a tutorial on how I make these so that you can make them yourself if you chose. 

So look for the tutorial soon. I am making new designs and will do a tutorial soon. I make the designs with photoshop and then print them out. 


#badge #badgereels #holder #badgeholder #crafts #design #digitaldesign #photoshop


Sunday, September 21, 2014

Free Minecraft Chore Chart & Award System with Printables

Hello,


When it comes to chores in our house, it becomes a CHORE to get them to do chores-pun intended! They would rather play Minecraft all day long or just play all day long! Not only do they NOT want to do chores but they also think they should bet a toy everyday and in-between that comes candy every time we walk into the store. I had to figure out a system to get them to do their chores and make it a bit fun too. They need to learn responsibility in this world because you have to work for what you want.

Yesterday, my 10 year old says, "mom, can I have this new star wars lego toy? It only costs $99." I said, "uh, no but you can save your chore money and buy it that way." He says to me-just as serious as he could be, "all you got to do is go to the bank and take it out or write a check and get money anytime you want." um.....yeah.....it doesn't work that way. The bank does not just give you money, you have to earn it and then put it in there. If only the world worked that way!

So, my 7 year old really has a hard time doing chores. He spends more time complaining about doing them then the time it takes to actually do the chore. So I had to come up with a way to motivate them and I asked them for their opinion and we went from there. It has been our second day and they actually race to finish their chores first and they want to do a good job. As soon as they get home, they can't wait to do them. Let me explain a little further because just a chore chart isn't magically making them do their chores....I had to get a little creative! Please read on...

The chart:

My version of a Minecraft chore chart called: (Minechores)

The Theme:

Obviously, Minecraft!

How it all goes down:

If they finish all of their chores and do them correctly, they place a Minecraft TNT block next to the chore they completed...or BLASTED (hence-TNT) haha...they loved it!

Then if they finish all chores for that day and have the day full of TNT blocks, they get a stick or iron ingot to place in their inventory. I have printed and laminated a picture of the actual inventory in the game and printed out a crafting table and taped the inventory on the craft table. In the game, you click on the craft table and your inventory pops up.

Then, on the last day of the week (Saturday) if they have crafted their iron pickaxe (the pickaxes, I made 2 of them out of foam board and printed it out and glued it on both sides but they can't use them until they have done all chores for the week and have crafted one), then they get to "Mine" for their surprise! They are EXCITED about this part. I cut several holes in a big foam board and then covered the holes with the blocks from Minecraft and on the other side of the foam board "the back" I have attached little paper sacks with various surprises in them (money, coupons (I made up), toys they were wanting, etc.) in those boxes and then they get to use the pickaxe they crafted to Mine for their awards. The only get to pick one block to "mine" from for that week. This idea I got from ACasarella and she called it a "punch box" which was used for a birthday party. I thought this would be great to do as a Minecraft Mining to go along with a chore chart.

So far, the kids have done well with their chores! We had a great week and they got to Mine a block and LOVED it! They literally could not wait to "mine". They even came home on Friday afternoon and did their home work without griping about it! Can you say........awesome????

Ok, here are the pictures and an explanation of how we did it. I will also have the links for some of the things I made so you will be able to have your own Minechore chart too.

Below is the chart I made and you can find the download link below it. I found the blank template that just had boxes that I used at My Digital Studio. I tailored it to the way I needed.

Then I downloaded the Minecraft font for free at 
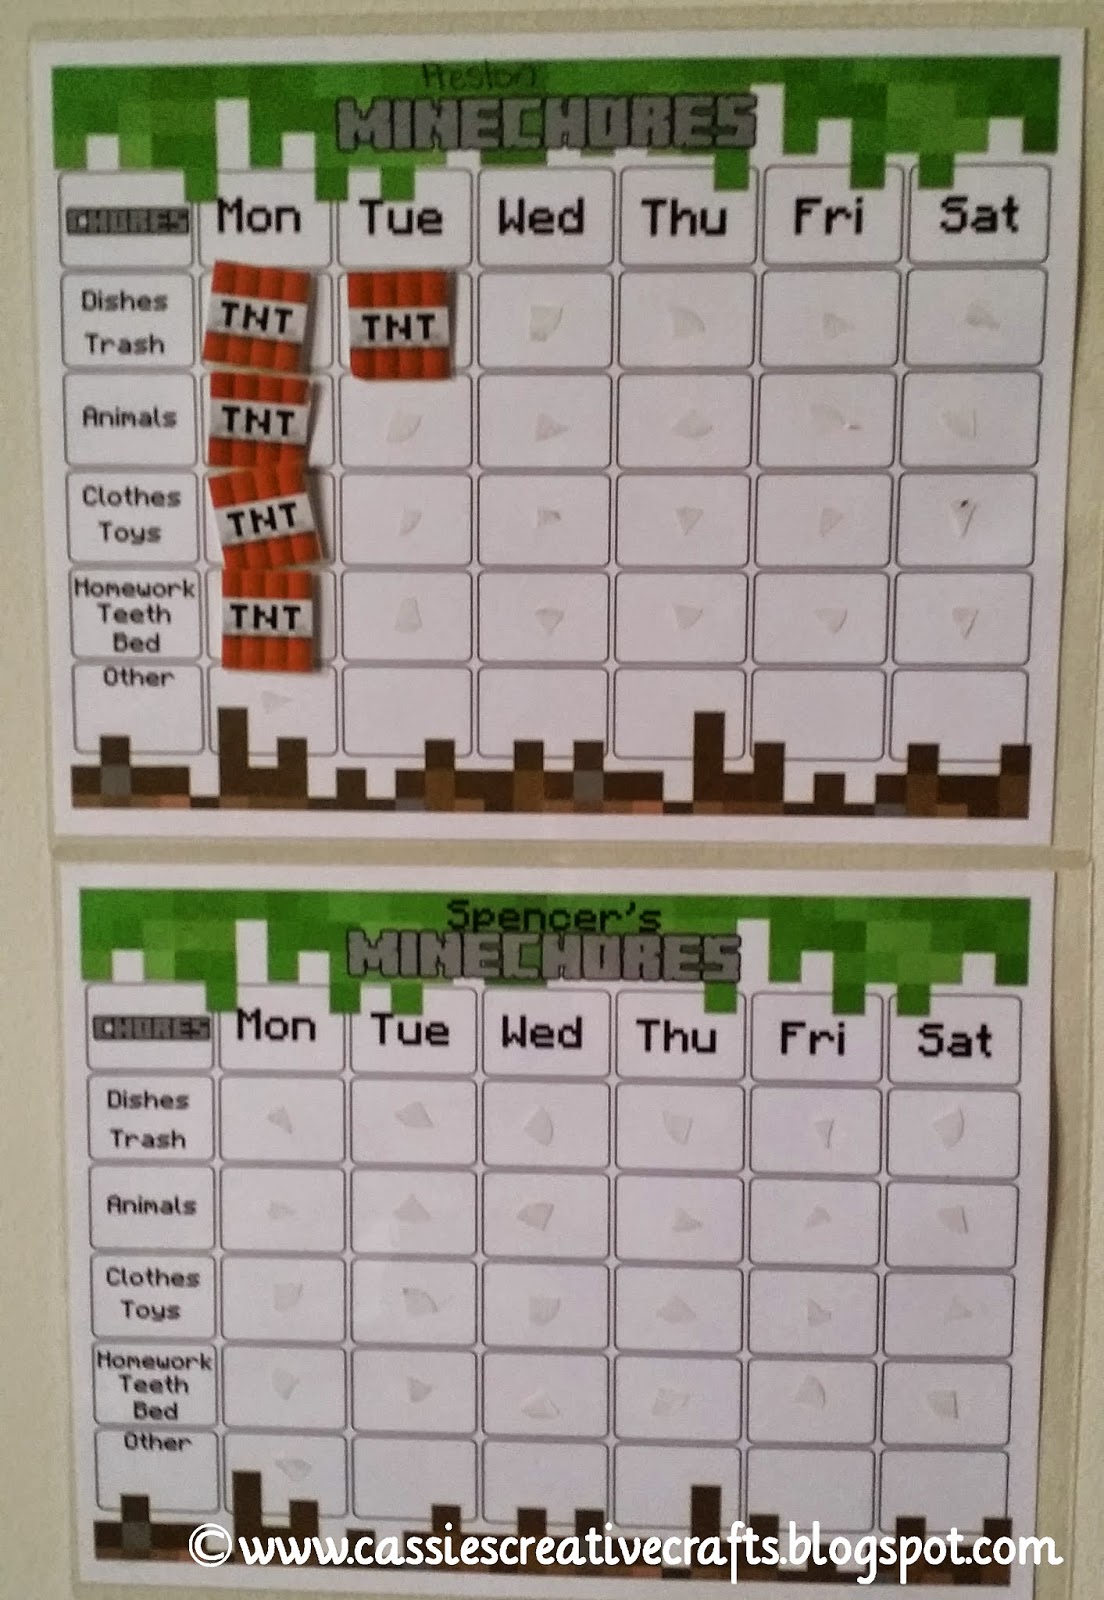
Dafont. There is the chart below. Is is only Monday thru Sat. because I let them have Sunday off of the regular chores (besides brushing teeth and bedtime and animals-they do on Sunday too).

Copyright Cassie's Creative Crafts

You can download the rest of the stuff at the end of the post...

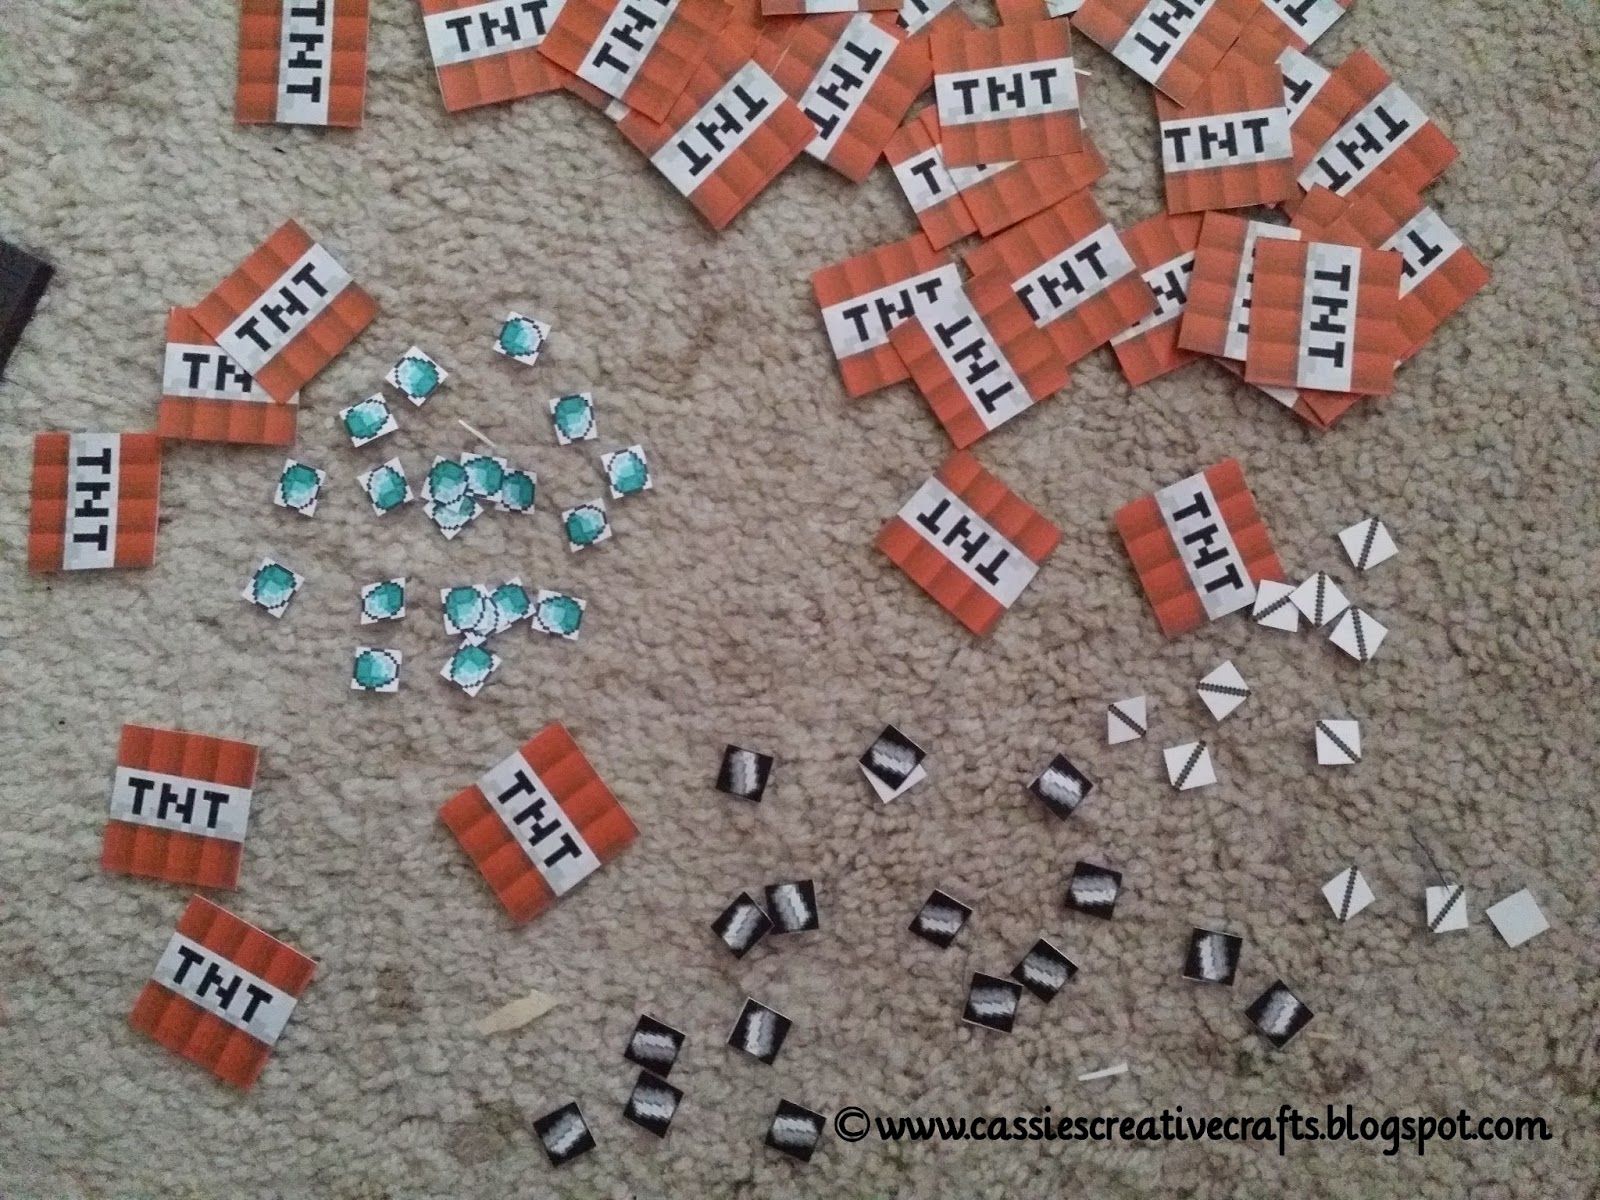
So in the chart above, the boys place a TNT block that I made and laminated in the square next to the chore they completed....see below...


Above, is the blocks of TNT cut out, along with the supplies (iron ingot, sticks, diamonds) to craft their pickaxe. The TNT goes next to each chore that they finish and once they do every chore for that day, I give them a stick, diamond, or iron ingot 

Then, they place their iron or stick or diamond (whichever they got for finishing their chores for that day) in their inventory that is on their craft table...see below


In the picture above, next to the chore charts, you see the craft table with their inventory. I have put velcro on the squares and when they finish a days worth of chores then they get one supple that goes towards their pickaxe. See below...


See above, in order to craft a pickaxe, you need two sticks and three iron ingot or diamond (whichever they want) so that is five days worth of chores and then on the sixth day they craft their pickaxe and that is when I give it to them to "Mine" their prizes. I let them have sunday off. 

Below is the "Mine" board where they pick one block to "Mine".


Here they are getting ready to "Mine"...


If you have any questions, please let me know. I hope you all enjoy the free printable!

I would love to see what you all do with it!


#printables #freebies #minecraft #chorechart #minecraftchorechart


Sunday, August 17, 2014

Craft Supplies Storage Idea:Fun and Cheap


I have always heard of the saying "One man's trash is another man's treasure" and when it comes to my crafts, I live by this saying. No, I promise, I am not crazy, nor do I go dumpster diving every Friday night either...hmmm...that gives me an idea, just teasing.

I wanted to share with you how you can save money at the same time becoming innovative as well as green by recycling. WOW, that sounds empowering! Well, it is true! When it comes to crafts, I am constantly looking at items and trying to figure out how I could use it in my work. I love using certain items people are going to throw away to make dollhouse miniatures, various crafts with my boys, plus many more ideas.

For instance, did you know that Popsicle sticks can be used in a variety of crafts as well as in the miniature world? I use them in several ways; just to name a few: dollhouse siding, dollhouse wood floor, dollhouse furniture, dollhouse wooden crate, dollhouse roof, plus so many more!!! They even sell them in the craft stores...but why do that when you can have your cake and eat it too (and by cake, I mean Popsicle), plus you are keeping that much more out of our landfills. Who knew you could save the world one Popsicle stick at a time!!! :)

So today, I am sharing with you one way you can turn and everyday spice rack into an ultimate craft supply storage organizer. So if you come across one that you don't want anymore or you found at a garage sale or maybe a friend is wanting to throw it away or sell it snatch it up because there are many things you can do with it. I am going to show you a few today...
Storage ideas copyright Cassie's Creative Crafts
Copyright Cassie's Creative Crafts
Storage ideas copyright Cassie's Creative Crafts
This is the spice rack that my friend gave me. It spins and the if you see below, the tops come completely off. You can put most any small things inside them and store them. Plus, they are clear and I can see what I want!
Storage ideas copyright Cassie's Creative Crafts


Storage ideas copyright Cassie's Creative Crafts
Storage ideas copyright Cassie's Creative Crafts 

Storage ideas copyright Cassie's Creative Crafts


#craftstorageideas #crafts #trashtotreasure

Saturday, June 28, 2014

Minecraft Shrinky Dinks Craft Tutorial

All rights reserved copyright cassie's creative crafts
Copyright Cassie's Creative Crafts
Hello, I want to share another Minecraft craft that you can do with the kiddos. So how does one get so attached to this game, you ask? Well...play the game and you will see. It really teaches the kids motor skills.

So, today we are going to talk about how to make Minecraft Blocks using shrinky Dinks. You can use your finished product to make so many items, for instance, you can make a charm for a necklace or bracelet, they can be a magnet, a keychain, or even earring, plus so much more! We are making magnets and keychains with ours.

Supplies
  • printer (make sure you set your printer settings to its correct settings for the shrinky dink paper)
  • Shrinky Dink Paper that you can print on with inkjet printer (there are many kinds, I used the one below)

  • Sandpaper
  • oven or heat gun (not hair dryer!) Heat guns are made to work with crafts. See the one I have below...


  • accessories (keychain, chain for necklace, magnets, etc.)
Getting Started

  1. You need to sand the shrink dink paper really well. *some shrinky dink paper doesn't need to be sanded but I think that if you are wanting to print on it then it needs to be sanded.* sand it really well up and down and then side to side and I do this a couple of times. (The sanded side is the side you will print on and so it needs the texture but the sanding needs to be evenly sanded and no shiny areas of the paper showing through.
  2. Once it is sanded and you have cleaned it off, you can now print the blocks of your choice onto the paper. I have included some of the blocks we used if you want to download them.
*note* I do not claim these Minecraft images as my own. I downloaded them from the internet and can give you the places and websites of where I got them from. 

property of cassies's creative crafts

*They appear big when you print them but they shrink to about 1 inch or a little smaller*

property of cassias creative crafts
Here is what they look like printed on the shrinky dink paper! pretty cool, huh!!
Depending on which blocks you print, sometimes the detail doesn't show, but the ones above worked out well!

After you print them, I would allow them to dry for several hours.
After they are good and dry, then here is where you want to make a whole if you are going to make a keychain or jewelry.

Next, we but them out and then used the heat gun CAREFULLY to shrink them. *If you use a heat gun, don't freak out if the the blocks start to curl up into a ball. That is NORMAL. Keep using your heat and it will straighten out. 

*They also curl up in the oven too but we don't usually see that. There are directions on the packages on how long to heat them in the oven. PLEASE FOLLOW DIRECTIONS. 

Then, we LIGHTLY and VERY CAREFULLY sprayed them with a varnish-keeping the spray at least 12 inches from them and do not allow them to get fully wet from the varnish because the ink will run! We learned that by mistake. :) 

Then, you are ready to make what you want out of them.

They are so much fun and really hold a lot of detail in them once they shrink. 

See below of some of the finished ones that my boys and I made. We were pretty happy with how they turned out. I really liked the creeper one too but it got ruined because I put too much varnish on it at first.. The TNT block was one of my favs too. So, I hope you enjoy this project as much as we did making it because it really is fun, unique, and craft!
property of cassia's Creative crafts
Above, is the grass block we made...property of cassie's creative crafts
property of Cassie's Creative Crafts
Cow we made w/ Shrinky sinks. copyright Cassie's Creative Crafts


property of Cassie's Creative Crafts
Above, is the cow that we made. copyright Cassie's Creative Crafts

Property of Cassie's Creative Crafts
Here is the TNT block we made. copyright Cassie's Creative Crafts

Property of Cassie's Creative Crafts
Above, is another picture of the TNT block we made. copyright Cassie's Creative Crafts

Property of Cassie's Creative Crafts
Here is the Enderman we made. Property of Cassie's Creative Crafts

property of cassies creative crafts
Here is a spider that we made. Property of Cassie's Creative Crafts


Well, I hope you enjoyed this tutorial. I would LOVE to see what you did with it and what you made out of them!

#minecraft #crafts #kidscrafts #tutorial #crafttutorial #jewelry #shrinkydinks #keychain